Shaving Cream Tutorial
by Beate Johns
Copied from Splitcoaststampers.com
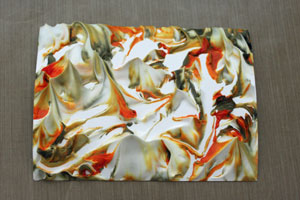
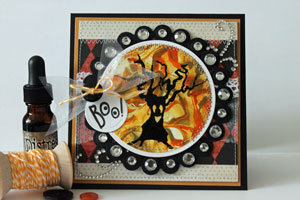
Use re-inker and shaving cream to get a wonderful smelling background.
Supplies

Shaving cream
2-3 dye ink pad re-inkers (Frayed Burlap and Spiced Marmalade Distress Re-inkers used here)
Wooden stick
Container (paper plate used here)
Card stock
Paper towels
Stamps, The Cat's Pajama's used here
Step-by-step
Step 1
Fill your container with shaving cream

Use a wooden stick to smooth it out a bit.

Step 2
Add several drops of each of your re-inker colors to your shaving cream.

Step 3
Mix shaving cream and re-inker in a swirling motion

Step 4
Continue to mix until you like the design/swirls you see.

Step 5
Press your card stock into the shaving cream. Make sure the card front is completely coated.

Step 6
Pull card stock out of the shaving cream.

Step 7 (optional)
Lay another piece of card stock on top of the one covered in shaving cream. Press together then pull apart giving you two shaving cream coated pieces of card stock.

This will give you two shaving cream coated pieces of card stock.

Step 8
Take a paper towel and wipe away the shaving cream in a swirling motion.

Step 9
Let dry.

Step 10
Finish your card. Either layer an image on top or stamp directly onto the background.

Pin It Now!
by Beate Johns
Copied from Splitcoaststampers.com
Use re-inker and shaving cream to get a wonderful smelling background.
Supplies

Shaving cream
2-3 dye ink pad re-inkers (Frayed Burlap and Spiced Marmalade Distress Re-inkers used here)
Wooden stick
Container (paper plate used here)
Card stock
Paper towels
Stamps, The Cat's Pajama's used here
Step-by-step
Step 1
Fill your container with shaving cream

Use a wooden stick to smooth it out a bit.

Step 2
Add several drops of each of your re-inker colors to your shaving cream.

Step 3
Mix shaving cream and re-inker in a swirling motion

Step 4
Continue to mix until you like the design/swirls you see.

Step 5
Press your card stock into the shaving cream. Make sure the card front is completely coated.

Step 6
Pull card stock out of the shaving cream.

Step 7 (optional)
Lay another piece of card stock on top of the one covered in shaving cream. Press together then pull apart giving you two shaving cream coated pieces of card stock.

This will give you two shaving cream coated pieces of card stock.

Step 8
Take a paper towel and wipe away the shaving cream in a swirling motion.

Step 9
Let dry.

Step 10
Finish your card. Either layer an image on top or stamp directly onto the background.

I am very thankful to you for sharing this excellent knowledge. This information is helpful for everyone. So please always share this kind of information. Thanks. straight shave Vancouver
ReplyDeleteIt is truly a well-researched content and excellent wording. I got so engaged in this material that I couldn’t wait to read. Read more info about Vanilla Shaving Cream. I am impressed with your work and skill. Thanks.
ReplyDeleteThis comment has been removed by the author.
ReplyDeleteExtremely useful information which you have shared here about Vanilla Shaving Cream This is a great way to enhance knowledge for us, and also beneficial for us. Thank you for sharing a blog like this.
ReplyDelete