Triple Stamping
by Joan Ervin
Copied from Splitcoaststampers.com
Stamp over several layers to create a dimensional image.
Supplies
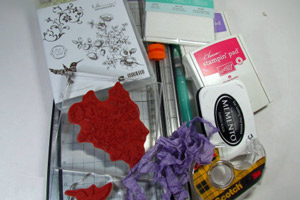
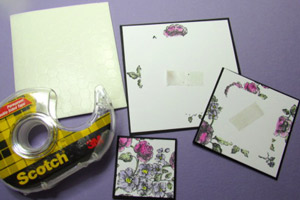
White card stock
Black card stock
Paper trimmer
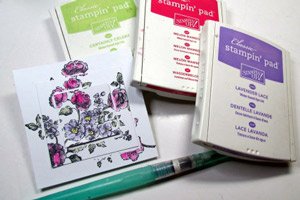
Stamp or stamps large enough to cover a 4" area
Two sided tape
Adhesive or glue
Foam dots
Coloring medium
Embellishments
Step-by-step
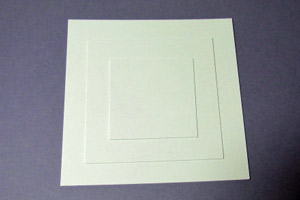
Step 1
Cut white card stock into one 2", one 3" and one 4" square.
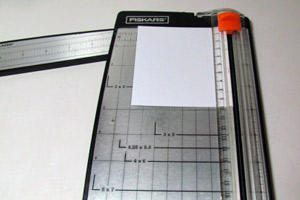
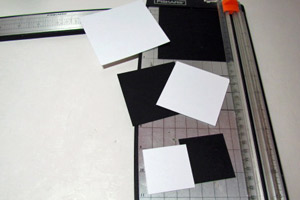
Step 2
Cut black card stock for matting into one 4 1/8" square, one 3 1/8" square, and one 2 1/8" square.
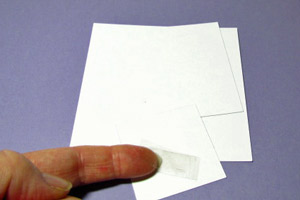
Step 3
Stack the layers smallest on top . . . once you have them lined up the the way you want, lightly tape the layers in place using a small piece of double sided so the layers stay in place when you stamp over them.
Step 4
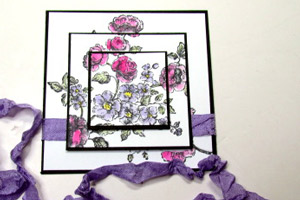
Stack the layers in the center or be creative and stack them along the side.
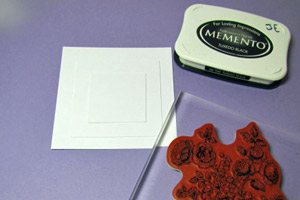
Step 5
Stamp your image over all three layers at the same time
Step 6
You will have gaps around the second and third layers, however, when you add the matting layers the gaps will disappear.
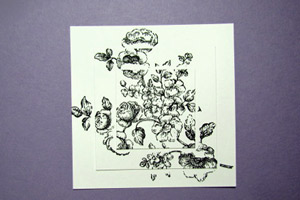
Step 7
Color image before you adhere layers
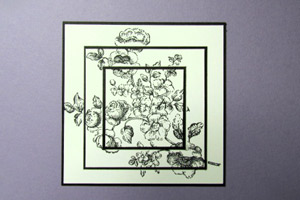
Step 8
Adhere layers . . . use foam dots to adhere the top layer to add a little dimension.
Step 9
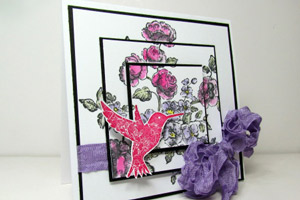
Add embellishments and adhere layers to card base.
Step 10
Finish your card.
Pin It Now!
by Joan Ervin
Copied from Splitcoaststampers.com
Stamp over several layers to create a dimensional image.
Supplies
White card stock
Black card stock
Paper trimmer
Stamp or stamps large enough to cover a 4" area
Two sided tape
Adhesive or glue
Foam dots
Coloring medium
Embellishments
Step-by-step
Step 1
Cut white card stock into one 2", one 3" and one 4" square.
Step 2
Cut black card stock for matting into one 4 1/8" square, one 3 1/8" square, and one 2 1/8" square.
Step 3
Stack the layers smallest on top . . . once you have them lined up the the way you want, lightly tape the layers in place using a small piece of double sided so the layers stay in place when you stamp over them.
Step 4
Stack the layers in the center or be creative and stack them along the side.
Step 5
Stamp your image over all three layers at the same time
Step 6
You will have gaps around the second and third layers, however, when you add the matting layers the gaps will disappear.
Step 7
Color image before you adhere layers
Step 8
Adhere layers . . . use foam dots to adhere the top layer to add a little dimension.
Step 9
Add embellishments and adhere layers to card base.
Step 10
Finish your card.
No comments:
Post a Comment
I'm constantly striving to improve my blogging and card making skills so I really appreciate any comments/suggestions that you'd like to share. Thank you for stopping by, have a great day!